[ROM] [4.2.1] MegaHD Rom For Micromax A116

[ROM] [4.2.1] MegaHD Rom For Micromax A116
 

Biggest Surprise Awated Yet 
4.2.1 MegaHD ROM
This is the First Ever Upgrade For Micromax A116  .


MegaHD Rom Features

-> Android 4.2.1
-> New Baseband
-> Faster And Smoother
-> Pre-Rooted
-> busybox
-> init.d Added
-> Faster Streaming
-> Net Speed Tweaks
-> Signal Tweaks
-> Fast Reboot
-> Better Responsiveness & Speed
-> Ziplagined and Deodexed


Download V1 : https://docs.google.com/file/d/0B10g...QzA/edit?pli=1
Update Fix : http://q.gs/48y1H

(Kindly Follow Instruction To Install ROM , Read Notes Before Post Question. )


How To Flash :
( You Can Take CMW Backup for Revert back to your old system )

1) Download Rom.zip File
2) Put into External/Internal SD Card
3) Go To CMW Recovery
4) Wipe Data/Factory Reset And Wipe Partition
5) From Advance Menu Do Dalvik Catch Clear
6) From Advance Menu Do Battery State Clear
7) Go in Mount And Storage select FORMAT SYSTEM
8) Select Intall From SD and Select File And Click YES
9) Select Rom.zip And Select YES
10) Reboot Your System
11) Enjoy


Disclaimer :
I Will Not be Responsible For Any Brick or Any Problem So Flash At Your Own Risk.
Thank You.

[ROM][AROMA][A89] Xtreme-Mod 4 | Update Micromax A89 Ninja

[ROM][AROMA][A89] Xtreme-Mod 4 | Update Micromax A89 Ninja

Xtreme-Mod 4 - Solid,Fast,Better

Rom Features:-


Based On Stock Rom V3
Pre-Rooted.
Xperia Themed.
OTA Enable
Iphone Keyboard
Added New Ringtones.
Fast GPS.
Not Heat More.
Zip aligned.
Added Bravia Engine.
Added Awesomebeats
Supper Smooth scrolling mod.
Awesome Lock screen
Cool Statusbar
Modified settings app
My Own 3D Bootanimation
Added init.d tweaks Support
Added lot of tweaks
Performance tweaks
Battery tweaks
Jelly Bean Camera And Gallery
Remove Boot sound
Smooth touchscreen tweaks
Increased battery backup
Added build.prop tweaks
Added init.d tweaks
1% battery mod
Support Ext2
Patched Services.jar for Full multitasking and
more battery backup

Lot Of More Features Inside The Rom

Finally The Wait is over! The Most Awaited Custom ROM for Micromax A89 is here!


Installation Steps Only With CWM 6:

Make Backup BEFORE Flashing

1.Download Xtreme-Mod_4.zip

2.Put it on your SDcard

3:Go to CWM Recovery(Press Vol. Up Power Button)

4.Wipe Factory/Data Reset

5.Format System(Mounts And Storage>Scroll Down>Format System)

6.Format Dalvik Cache(Advanced>Dalvik Cache)

7.After Wiping and Formating,

Go back at the first page of the CWM recovery and choose install .zip from SDcard

8.Choose Xtreme-Mod_4.zip

9.Reboot
 
Download Link:-

I Am Not Responsible For Any Problem

Xtreme-Mod 4 For A89
 
ScreenShots 
Click image for larger version  Name:	Screenshot_2013-04-04-17-00-20.jpg Views:	409 Size:	28.1 KB ID:	1880441  Click image for larger version  Name:	Screenshot_2013-04-04-17-00-28.jpg Views:	393 Size:	22.2 KB ID:	1880442  Click image for larger version  Name:	Screenshot_2013-04-04-17-00-38.jpg Views:	380 Size:	32.1 KB ID:	1880443  Click image for larger version  Name:	Screenshot_2013-04-04-17-00-52.jpg Views:	344 Size:	36.0 KB ID:	1880444  Click image for larger version  Name:	Screenshot_2013-04-04-17-01-20.jpg Views:	318 Size:	18.4 KB ID:	1880445

Click image for larger version  Name:	Screenshot_2013-04-04-17-01-56.jpg Views:	299 Size:	21.6 KB ID:	1880446  Click image for larger version  Name:	Screenshot_2013-04-04-17-02-11.jpg Views:	332 Size:	29.8 KB ID:	1880447  Click image for larger version  Name:	Screenshot_2013-04-10-10-50-32.jpg Views:	312 Size:	35.0 KB ID:	1880448   

[[ZhaoBlastJB]] First Ever Jelly Bean Custom ROM for Micromax A90s and BLU Vivo 4.3

[[ZhaoBlastJB]] First Ever Jelly Bean Custom ROM for Micromax A90s and BLU Vivo 4.3

Presents you Modified First Ever Jelly Bean Custom ROM for Micromax a90s and BLU Vivo 4.3


Some Features of ROM


BASE on JB 4.1.1
Removed unused system apps
zipalign all apps
De-Odexed apps and Framework
Added Data/Apps Functionality in ROM
Added Latest Chainfire SuperSU
Added Nano+Spyro Tools
Added Bash Shell
Removed Annoying Boot Sound
Init.d supported
Init.d tweaks for battery savings and overall performance
Build.prop tweaks added
LCD Density set to 250 for better Graphical View in your A90s or BLU Vivo 4.3 with XZ Home
now no more ADB icons in Statusbar :P shht gooo :P
Modified Statusbar to Canvas3D
Micromax Canvas3D Boot & Shut Animations added
New Customized Settings Styles
Add Sony Walkman with Enhancements
Add Sony Album :- View and share your moments in High Clarity :P
Add Sony Bravia 2+ Bravia 3 Patch for Better Image & Graphic Views
Added Gaming Tweaks : Gaming Performance is Improved
Solved GPS Bugs itself now u locked in a seconds:P
Removed GAPS :P for better and smoother performances
( Only GTalk and Playstore remain )
dont remember any other changes


Requirements

First Flash SPFT Firmware of Blu Vivo 4.3 here its must needed........ otherwise ROM not bootup


How to Flash ROM

Wipe cache
Wipe data
Advanced/wipe delvik cache
Mount/format system
Install Zip from sd card
Reboot

After that Boot logo appears wait some minutes, it will take more time for first boot for deodexed Rom.


Bugs :-

Still not find any known bugs 

SCREENSHOTS OF ROM


[TWRP] TWRP Recovery v2.3.2.3 For Micromax A89

[TWRP] TWRP Recovery v2.3.2.3 For Micromax A89

So, for installing TWRP you need to follow these steps:


IMP:[*] You need not to have rooted phone.
[*] This is for MMX A89 ONLY! Don't use for other phones as you can brick it!
[*] Although, this rom has been tested, I'm not responsible for any damage!


Prerequisites :

1. MTK6577 Drivers

2. SP Flash Tool

3. TWRP Itself!


Now we are ready to Flash!

[IMPORTANT : DISCONNECT YOUR PHONE BEFORE STARTING THIS TUTORIAL]

1. First of all, Download all of the packages listed above.

2. Install Drivers and Extract SP Flash Tools & TWRP image.

3. Now open extracted SP Flash Tool folder and run Flash_tool.exe

4. Click on "Scatter-loading" button which is on the right side below Downloading Agent. A new window will open. Browse to the extracted "TWRP for MMX A89-dan.man" folder and select "MT6577_Android_scatter_emmc.txt" file.
Refer this screenshot for more help:


5. Flash tool will populate the Map file on the application window. You will see multiple entries. Uncheck all entries except for RECOVERY.

6. [Skip this step if recover.img is already selected] Now to select recovery file, click on recovery and select recovery.img file.


7. Now click on "Download". Warning message will occur, but ignore that and click Yes.


7. You will see in the status bar below "Searching", now connect your phone (with battery inserted + Press and Hold Volume Up Key) via the USB cable. Keep those buttons holding while the process is completing.

8. Wait for the process to finish and then you will get a window showing green circle.

Congrats You have flashed TWRP Recovery v2.3.2.3 ! Enjoy!


Note: If you get any error in SP Flash Tool, then recheck your MTK drivers installation or manually install them through device manager.
-------------

Booting into TWRP Recovery v2.3.2.3 is the same as in the stock recovery. Switch on the phone with "Volume Up" and "Power" button Pressed. The Phone will boot into TWRP Recovery v2.3.2.3!

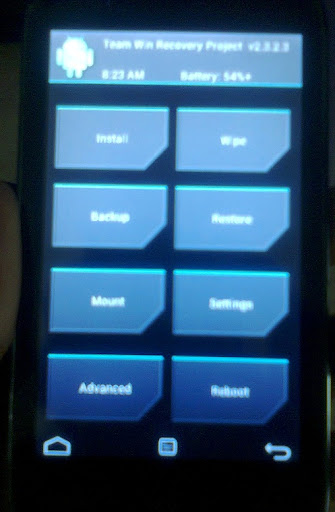
Here's a screenshot of TWRP working on A89 :

[MOD] SWAP External and Internal SD Card For Micromax A89

[MOD] SWAP External and Internal SD Card For Micromax A89

Hi Guys,

As you know guys MMX A89 doesn't have too much of a internal storage! We can't install large HD Games, we cannot install several applications because of the small memory restriction, So today i am going to tell you how to swap your internal storage with your external storage!

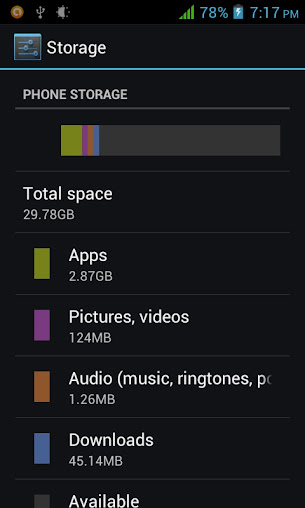
THE RESULT AFTER SWAPPING:


IMP:


[*] Your Device should be rooted!

[*] This in for A89 Only!

[*] Although this MOD is tested, I am not responsible for any damage!


Prerequisites :

1. A ROOT Explorer (I am using Xplore)
2. "vold.fstab" File. Dowload it from below!


Now, Doing the Dirty Work :

1. Take a backup of your device via CWM/TWRP or any other recovery just to be safe.

2. [IMP] Copy every folder that is present in your internal sdcard to the external sdcard, so that your apps and games continue to work once you have swapped the sdcards.

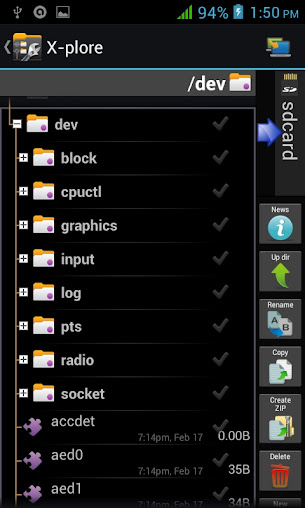
3. Browse to the location /system/etc and you will find a file named "vold.fstab". This is the file that we have to replace!
See the screenshot below:


4. Rename existing "vold.fstab" to "vold.fstab.bak" just to be sure, Now copy the downloaded file here.

VOILA! You're done!

5. Just Reboot your device and go to the storage section on your device.


If the phone memory shows the external card properties, then you can thank me! and don't forget to format the newly prepared external SD card (which was internal a while ago :P) as you have already copied the file to the newly made internal card!

Cheers!

Modified vold.fstab for Micromax A89.rar

[ROM] JellyXperia V2.1 For Micromax A116

[ROM] JellyXperia V2.1 For Micromax A116


JellyXperia is the Xperia Z Based Custom Rom for Micromax A116
This ROM is made for Looks and Smoothness of Micromax A116.


JELLYXPERIA ROM Features

-> Xperia Z Launcher
-> Xperia Z Movies
-> Xperia Z Albums
-> Xperia Z Wallpapers
-> Xperia Z Walkman
-> Xperia Z Widgets
-> Xperia Keyboard
-> Xperia Z Sounds
-> Xperia Z Bootanimation
-> Xperia Z Fonts
-> Xperia Z Framework
-> Xperia Z SystemUI
-> Xperia Z Settings
-> Xperia Z Album Share
-> Xperia Z Sound Enhancement
-> New LockRing
-> Adjust All Background Color to Album Art on Walkman
-> Music Control on Notification
-> Visualizer
-> Clear Bass
-> Clear Stereo
-> Clear Phase
-> Dynamic Normalizer
-> xLoud
-> Surround Sound VPT
-> Walkman Music Widget
-> Walkman DLNA
-> Friend Music FB
-> FB Music Like
-> Music Extension for find info on internet
-> Walkman More Stable
-> Bravia Engine 2 for Album & Movies
-> Photo & Video widget
-> MIUI File Manager
-> MIUI Sound Recorder
-> RTMixManager Integrated
( Drastic Improvement in Gaming)
-> New Gmail
-> New Baseband
-> Auto Rotation bug fixed
-> Minor Bugs Fixed
-> Removed mmx crap apps
-> Nano editor added
-> bash command added
-> Added custom boot animation functionality
-> Faster And Smoother
-> Pre-Rooted
-> busybox
-> Performance Tweaks
-> Removed Micromax Registration
(As it charges every time u flash or reset rom)
-> Flipboard Issue Bug Fixed
-> init.d Added
-> Faster Streaming
-> Net Speed Tweaks
-> No Delay In Making Call
-> Battery Tweaks
-> Proximity Tweaks
-> More RAM Free
-> Signal Tweaks
-> Fast Reboot
-> Better Responsiveness & Speed
-> Locked Launcher In Memory
-> Kernel Tweaks
-> Enabled Surface Dithering
-> Enabled 270 Degree Rotation
-> Ziplagined and Deodexed
-> AD Block host by default
-> Gps.cofig added
-> Flashlight intensity increased
-> Wifi direct


Kindly Follow Instruction To Install ROM , Read Notes Before Post Question.


How To Flash :
( You Can Take CMW Backup for Revert back to your old system )

]1) Download Rom.zip File
2) Put into External/Internal SD Card
3) Go To CMW Recovery
4) Wipe Data/Factory Reset And Wipe Partition
5) From Advance Menu Do Dalvik Catch Clear
6) From Advance Menu Do Battery State Clear
7) Go in Mount And Storage select FORMAT SYSTEM
8) Select Intall From SD and Select File And Click YES
9. Select Update3.zip And Click Yes.
9) Go to Advanced Menu and fix permissions.
10) Reboot Your System
11) Clear Data of Xperia Home and Album in Settings\Applications\All Apps (Important)
11) Enjoy


Disclaimer :
I Will Not Responsible For Any Brick or Any Problem So Flash At Your Own Risk.
Thank You.

Changelog:
v2.1

1. MIUI File Manager Removed
2. Default File Manager Added
3. Walkman Music Widget Added
4. Turbo Engine Added
5. RTMixManager 2 Added
6. Camera Added
7. Sound Enhancement Added
8. Google Now Fixed

V2
1. New MIUI File Manager
2. New MIUI Sound Recorder
3. Xperia Z Framework
4. Xperia Z StatusBar
5. Xperia Z Settings Mod
6. Xperia Z Walkman
7. Xperia Z Albums
8. Xperia Z movies
9. Xperia Z Walkman DLNA
10. Xperia Z Social Album
11. Xperia Z Fonts
12. Xperia Z Sounds
13. New LockRing
14. Wifi direct Working
15. Sound Enhancement
16. All Bugs Fixed

[ROM][Celkon A200]SENSE based UI Rom[A.D.I Rom V.1]

[ROM][Celkon A200]SENSE based UI Rom[A.D.I Rom V.1]


Features:
#) Deodexed
#) Zipalined
#) Pre-Rooted
#) Battery Saver Tweaks(Has battery backup of 1.5 - 2 days on normal use)
#) Completely Fluid UI with no lags or anything
#)Based on SENSE Icons
#)Stock based with no problems
#) Separate JB styled gallery
#) Includes themes option
#) Themes option for keyboard too added includes:HTC,GALAXY,WOOD,SKY

How to install:
1)Download and copy ROM.ZIP And SENSETHEME.ZIP to SD CARD
2)Boot to recovery
3)Wipe DALVIK CACHE,CACHE,FACTORY Reset and FORMAT SYSTEM
4) INSTALL the ROM first and then Install the SENSETHEME.ZIP
5) Reboot and enjoy
Quote:
Download Links:

ROM:
http://content.wuala.com/contents/ja...131,2192108,18

SenseTheme.zip:

http://q.gs/48Idv

htcOneX_ui_Sounds.zip

[ROM][JB][4.1.2][JZO54K][RC2] Unofficial CyanogenMod 10 for Xiaomi MI-ONE

[ROM][JB][4.1.2][JZO54K][RC2] Unofficial CyanogenMod 10 for Xiaomi MI-ONE


CyanogenMod is a free, community built, aftermarket firmware distribution of Android 4.2 (JB), which is designed to increase performance and reliability over stock Android for your device.

CyanogenMod is based on the Android Open Source Project with extra contributions from many people within the Android community. It can be used without any need to have any Google application installed. Linked below is a package that has come from another Android project that restore the Google parts. CyanogenMod does still include various hardware-specific code, which is also slowly being open-sourced anyway.

All the source code for CyanogenMod is available in the CyanogenMod Github repo. And if you would like to contribute to CyanogenMod, please visit out Gerrit Code Review. You can also view the Changelog for a full list of changes & features.


Working:
  • Booting
  • Display
  • Touch
  • Sdcard
  • 3D
  • USB (Storage and ADB)
  • Audio
  • Charging
  • Buttons
  • Screenshot
  • Wifi
  • HW acceleration
  • Sensors(Accelerometer/Light/Proximity)
  • Camera
  • GPS
  • Compass
  • Bluetooth
  • Phone Call
  • Mobile Data
  • Offline changing
  • 1080p video recording


Not working:
  • all working now


Features:
  • Removed wallpapers and Some ringtones
  • removed LatinIME dictionaries other than en
  • some TTS language pack removed
  • a Firewall app include
  • background process limit is ten times of what is displayed (we have enough memory)


Known issues:
  • Galley sometime cannot play 1080p video
  • if Mobile Data not work, check APN settings


Screenshots:


Installation:
  • Put the zip in sdcard and rename to update.zip
  • Poweroff
  • press Power and Volumn Up button at the same time, will boot into recovery
  • Wipe Cache and User Data,
  • Install update.zip to System One
  • Reboot to System One
NOTE: System Two is not supported

Download:
Quote:
RC2: cm-10-20130417-RC2-mione_plus.zip
mirror: cm-10-20130417-RC2-mione_plus.zip

[ROM] Perfected android 4.2.1 for Fly IQ446/Gionee GN708W/Xolo Q800/AllView P5 QUAD

[ROM] Perfected android 4.2.1 for Fly IQ446/Gionee GN708W/Xolo Q800/AllView P5 QUAD

Gionee 4.2.1 android rom perfected....!!

Hi guys.... removed all gionee crap from gionee gn708w android version 4.2.1

CHANGELOG:
1. Based on gionee 4.2 base rom with sw update to v1.7, Pre rooted, titanim back up, advanced task manager , android tuner , media redirector pro , halo locker (no more transparent lines at lock screen...!!) pre installed.
2. Free memory 610 mb.
3. Removed Gionee launcher replaced with nova prime latest version launcher
4. Stock jelly bean icons and SMOOTH UI WITH NO LAGS.
5. Nexus browser with flash.
6. Default dialer changed with Reactiv T9 Dialer.
7. Contacts Theme changed.
8. Nexus sms app.
9. Play store working.
10. Nexus camera and gallery with working photosphere, panoroma.(http://q.gs/47shr )
11.Set everything shown in screenshot for media redirector pro...then only photo preview will be visible after taking with nexus cam with swiping....!! and yes u have to create DCIM folder in ur memory card if it already exists then its ok....and it doesnt auto start on boot and u have to press the red icon to green at start up...!!(credits to Nishan Goswami? )
12.Power saving enabled at power saving option and also in battery settings....!! remove both to get awesome benchmarks....!!
13.Also download and keep the zedge folder in ur memory card for wallpaper compatibility at first boot...!!


Instructions:
1.extract the twrp.rar and zedge.rar file to ur external sd card...This is only twrp compatible u cannot use cwm recovery to use this but u can install twrp restore this rom then again u can flash back to cwm recovery. To install twrp pls refer to this...  

TWRP 2.4.1.0 for Xolo Q800

TWRP 2.4.1.0 port works with this method.

You can get it from here http://q.gs/47noe

You have to follow the same procedure described in the original post in this thread, just use this recovery.img instead of the recovery.img given in the first post if you want TWRP instead of CWM.

and then for root, using TWRP, install the zip file for SuperSU that is attached in the first post in this thread. For instructions on how to do this, refer to the first post in this thread.

Xolo Q800 running TWRP - http://i.imgur.com/CQZczYy.jpg

Just FYI, the TWRP that I've linked to is for Fly IQ446, which the same phone as Xolo Q800 but with a different name. So, the phone is recognized by TWRP as Fly IQ446. 

 
2.after u go to twrp go to wipe option...then factory reset, then wipe system,then wipe cache and dalvik cache,then wipe android secure.
3.then go to restore option choose external memory and restore it...boot and ur done....enjoy...!!!

how to install TWRP tutorial.....

http://androidjugaad.com/showthread....d=2479#pid2479

known bug-sms not showing contact name only numbers...!!

Bug fix -1.download the below mentioned alcolawlThemeMMSbubble-v1.33.zip and keep in ur sd card..open titanium backup...select backup/restore option.....scroll down to...messaging 4.2.2-Dar...3(SMS/MMS PREFS)....touch it once and choose un-install !..then press yes.... followed by another yes
2.Now go to twrp or cwm recovery whichever u have and flash the alcolawlThemeMMSbubble-v1.33.zip...then wipe cache/dalvik cache...reboot...thats it and its fixed...!!


extract and see the screenshots from below ...!!

Screenshots

TWRP BACK UP

Zedge folder

alcolawlThemeMMSbubble-v1.33.zip

[ROM][MOD] Thunderbird i5 lte / Goophone i5 lite WHITE VERSION v1.0 Beta

[ROM][MOD] Thunderbird i5 lte / Goophone i5 lite WHITE VERSION v1.0 Beta


Details:

- Play Store Installed
- Apple Boot Logo
- Removed Chinese Apps
- Chinese spam and bloatware removed
- Slide to power off bug fixed (To be done)
- New iOS launcher installed
- Rooted with SuperUser Installed

Additional Apps:

- Root Explorer
- Weather Translated
- Default App Manager - To select launger
- Mobile Uncle tools
- Easy Touch

How to install it:

- Open the SP Flash Tool


- Load the scatter file from the ROM Folder


- Press F9 (Download Mode) or Firmware Download Mode
- Plug your phone through USB with it powered off


- Wait until the bars progress end and.
- When it finishes a green popup will appear.


And that's it! You have now installed the rom on it!

Partition you SD Card To Acquire more "Internal Memory"
Some people have 127MB internal memory, who ever wants to increase internal space by partitioning sd card
Follow the link here
I tested it on my phone and it works.

DOWNLOAD ROM v1.0 Here

Compatible With:
Hardware : MT6575 (MT6577 is Fake!)
Model : iphone 5
Build number : ALPS.GB2.MP.V2
Build date UTC : 20121201-065458
Android v : 4.2.1
Baseband v: MAUI.11AMD.W11.50.SP.V7, 2012/02/14 17:51
Kernel v : 2.6.35.7 (s022@s02) (gcc version 4.4.3 (GCC) ) #1 Sat Dec 1 14:51:12 CST 2012
Uboot build v : MAIN2.2.ubt.2506
LCD Driver IC : 1-0-nt35560_fwvga_mipi[/CENTER]